Disassemble, clean off the old glue, and re-glue with clamps. A loose chair can be saved without buying another one, but the old glue must be removed properly before starting over.
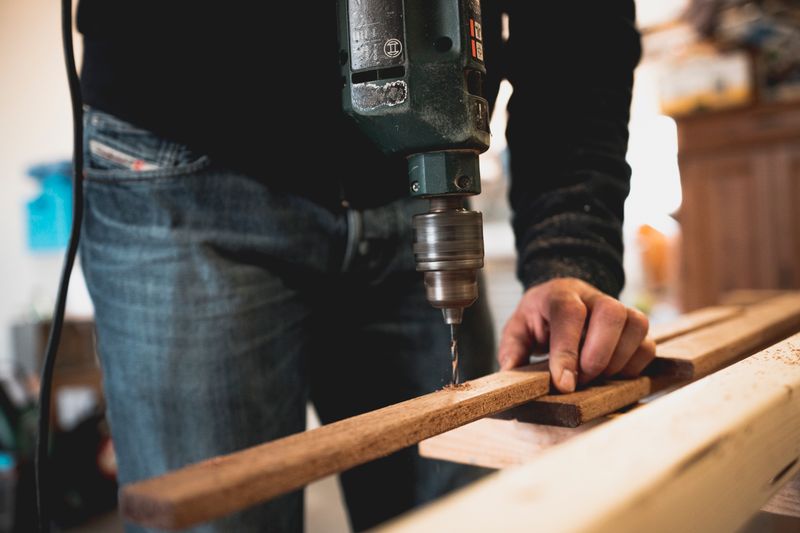
When a chair starts to wobble, the original glue has already given way. That is the starting point: no new glue will hold on top of a dirty, loose joint. Before diving in, it is worth assessing whether it is worth the effort. I check all the joints by moving them by hand, set the chair on the floor, and shake it gently. If it creaks in several places and the wood is split at the tenon, the repair gets complicated. If the movement is only in the legs or the stretchers, there is plenty of work to do.
To disassemble, I use gentle blows with a wooden block and a mallet, never with a metal hammer directly on the piece. The block spreads the impact and prevents marking the tenon. I strike from the side opposite the joint, holding the chair with the other hand so as not to force the rest of the legs. Sometimes the old glue is so hard that the joint won't give; there it's best to apply a little heat with a heat gun or steam to soften it before persisting. If the piece resists too much, it's better to stop than to split the wood.
Once disassembled, I scrape off the glue residue with a chisel and sandpaper. The tenon has to be clean down to bare wood, without old crusts that prevent the new glue from gripping. I also sand the inside of the hole with a small stick wrapped in sandpaper, because that's usually where most of the dried glue remains. If the tenon has become loose after cleaning, I wrap it with a turn of cotton thread or add a thin wooden wedge to restore the fit.
To glue up, I use wood glue, the same kind you can get at any hardware store. I apply it to the tenon and inside the hole, bring the pieces together, and let the glue push outward as I tighten. That's where the clamps and bar clamps come in: I hold the joint and check the square with a carpenter's square before tightening all the way. If the chair has stretchers, I dry-fit them at the same time so everything stays aligned in a single assembly. Over-tightening can dent the wood, so I put a block between the clamp and the piece.
Drying time depends on the glue and the workshop temperature, but it's best to leave it alone much longer than you feel like waiting. I move the chair only when the joint feels firm to the touch, and even then I leave it a while longer before sitting on it. If the movement was significant, I reinforce the stretchers with a new tenon or a glued block on the inside, as long as the piece allows it. Not every chair is worth the work: when the wood is cracked in several places or the seat has given out completely, accepting that it isn't worth it is also part of the craft.
Disassemble, clean off old glue, and re-glue with clamps. A visual walkthrough of the stages I follow when a chair starts to wobble and can still be saved.
Preliminary step: inspect the joint
Tools at hand
Fresh gluing
While it dries
Closing
If you have a loose chair at home and want to compare what you found when you took it apart, you can write to me. There is no support form or help desk: this is a personal log, so I reply when I can and with what I know. Before sending a message, check the frequently asked questions: they already cover the most common concerns about gluing, clamps, and when it is best to leave the chair alone.
Email is for specific questions about the process: what glue you used, how you removed a joint that would not budge, whether the crossbar split when you hit it. The more specific the detail, the easier it is to pinpoint where the repair is getting stuck.
If you want to understand the full step-by-step process, the main post already covers disassembly, cleaning out the old glue, and reassembly with clamps. The questions below are the ones that come up again and again when someone tries the same thing for the first time.
Av. Corrientes 1386, Floor 8, Office 802, Edificio Tornquist, C1043 Buenos Aires, Argentina
No. If the chair already moves, the original glue joint has failed and the new glue does not reach the inside of the joint. You have to open the joint, scrape out the dried residue, and glue it again with clean pieces.
It depends on the glue and the room temperature. The product label states the range, and in cold conditions it is best to extend the time before removing the clamps. Moving the chair before it sets ruins the work.
You can glue the crack with the same vinyl glue and hold it with a clamp, but if the movement was large it may be better to replace the piece. In the main entry I explain how I assess that case before continuing.
Not always. If the wood is split in several places or the joints no longer close, the repair will not hold. In the article I close with a reflection on when it is best to accept that and not force the work.
For privacy matters or the site's terms of use, the corresponding pages are available: privacy policy and terms.
Behind every entry there is a single person who takes things apart, tests, makes mistakes, and writes it down. There is no editorial team or workshop with employees: there is a workbench in Buenos Aires, worn tools, and the habit of writing down what happened before forgetting it.
When a chair starts to wobble, the work begins by assessing whether it is worth it. That same logic applies to every project that comes in here: look first, decide later, and keep a record of the result, even if it did not turn out well.
Writes the entries, takes the step-by-step photos, and puts together the materials lists. When repairing a loose chair, he insists on a point he repeats in almost every trade: the mistake is usually not in the new glue, but in not having removed the old glue properly. He prefers repairing over replacing and says so plainly when a part is beyond saving.
Woodworking runs through almost the entire notebook: benches, crossbars, glued joints, clamps and C-clamps holding the square while it dries. From there come the criteria repeated in this entry about chairs: gentle taps with a wooden block so as not to mark the piece, scraping off glue residue and patience not to move anything until it sets.
The same method applies to a new outlet, to adjusting the gears and brakes of an urban bike or to joining copper pipes. The tools and risks change, not the way of working: check, measure, test and only then close up. Each front has its own note and its own documented mistakes.
The notebook is meant for those just starting out and who don't want to buy a new chair because of a loose joint. That's why each entry includes what worked, what went wrong and how much it cost, without grand promises or ideal results. If you like getting your hands dirty, here you'll find the complete process and not just the tidy ending.
Workshop note
Notebook of projects, trades, and workshop notes
This entry about the wobbling chair came from a real chair that sat in a corner of the workshop for months until I decided to take it apart. There is no secret technique here: there is an order of steps, a couple of mistakes I have already made, and the habit of writing down what worked before I forget it. The notebook brings together light carpentry, basic electricity, bicycle maintenance, and small welding jobs, always with the same approach: telling what went well, what went wrong, and what I would do differently next time. If you are starting out in the trade, this is meant for you.
We use cookies to keep the site stable, remember basic options, and understand which pages are useful. You can accept, reject, or review the settings before continuing.