Workshop Notebook

Workshop notes published

Each entry starts with a specific question: how to make something work without spending too much or breaking anything in the attempt. Here you'll find the complete processes, with step-by-step photos, the materials list, and the mistakes that came up along the way. If you're just starting out in the trade, it's best to first read the note that most closely resembles what you have in front of you.

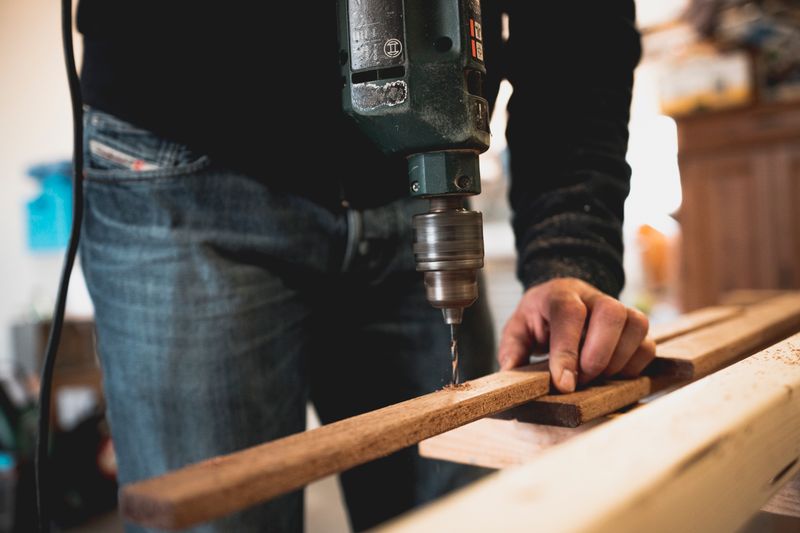
Wooden workbench with hand tools arranged on its surface

How to build a sturdy workbench from pine wood

The first bench I built came out crooked because I rushed the cutting of the legs and didn't check the square before screwing it together. In this entry I document the complete process: choosing 2x4 pine, marking with a square, cutting with a hand saw, and diagonal braces that prevent wobbling. I include the materials list with measurements, the assembly order, and a note on why it's best to screw and glue at the same time. I also cover which tools you need if you're just starting out and which ones can be postponed without ruining the result.

Read the full note


Hands with gloves handling electrical wires inside a wall box

Installing a new outlet without burning anything

Before touching any wire, I switch off the breaker and verify with a voltage tester that there is no current, something I learned after getting an unnecessary scare. In this article I detail how to identify live, neutral, and ground by color and with a multimeter, how to strip the wire without damaging the copper, and why it is better to use terminal blocks instead of twisting wires together. I also explain how to choose the wire gauge based on the expected load and what to do if the existing box is too small. I close with the final test: turning the breaker back on and measuring voltage before connecting any equipment.

Read the full article
Urban bicycle propped up with the rear wheel lifted while the derailleur is being adjusted

Adjusting the gears and brakes on an urban bike

The rear derailleur usually goes out of tune with use and with knocks from the bike rack. In this post I show how to check the tensioner, adjust the H and L limit screws, and tune the cable tension until every shift engages cleanly. I also cover V-brakes: how to center the pads, when to replace them due to wear, and why you should not lubricate the rim. I add a list of minimum tools for doing maintenance at home and an observation about chain noise that is often mistaken for a shifting problem.

Read the full post

Soft soldering on copper pipes: what I learned the hard way

Soft soldering looks simple until the solder won't flow and the joint turns out cold. In this piece I explain how I sand the pipe until it shines, apply flux, heat it evenly with a torch, and bring the solder close without resting it directly on the flame. I explain why it's better to heat the workpiece rather than the filler metal, how to spot a bad joint, and what to do if it needs to be redone. I also mention the safety measures I use: ventilation, gloves, and eye protection, because flux splatters and the flame doesn't forgive.

Read the full article
Disassembled wooden chair on a workbench with clamps holding the glued joints

Repairing a wooden chair that wobbles

When a chair starts to wobble, the original glue joint has already failed, and adding glue on top won't help. In this post I explain how to take the joints apart with gentle taps and wooden blocks, scrape off the old glue residue, and re-glue with wood glue. I detail how to use clamps and bar clamps to keep it square while it dries, how long to wait, and how to reinforce the stretchers if the wobble was severe. I close with a note on when it's worth accepting that the repair isn't worth it, and why.

Read the full post
Workshop wall with a wooden panel, hooks, and hand tools hung in order

Organizing the workshop on a two-meter wall

For a long time I had my tools piled up in boxes and I wasted more time searching than working. In this post I show how I built a wooden panel with hooks and shelves along a two-meter wall, prioritizing what I use every day at arm's reach. I explain how to group by trade (carpentry, electrical, bike) and by frequency of use, what is best left hanging and what should go in a drawer. I also share which supplies I buy in bulk and which are better bought individually so as not to stock up on too much.

Read the full post

Posts are published as the work progresses. If something you see here is useful for your own project, write to me and tell me how it went.

Before following the step by step: what this log covers and what it does not

It is worth clarifying a few things so that no one arrives at the workshop expecting something else. What is published here are notes from a hobbyist who works at home, in Buenos Aires, with hand tools and limited space. There is no team behind it and no technical service: when something goes wrong, it is told exactly as it happened and what was tried afterward is explained. The entries describe concrete processes of light carpentry, basic electricity, bicycle maintenance, and soft soldering on copper pipes, as well as notes on how to organize the bench and which supplies are worth buying in quantity.

Nothing written here is professional advice on electricity, gas, structures, or industrial safety. If the work involves installations you do not have under control, voltage you cannot verify, or risk of fire, you should call someone licensed. This notebook is for anyone who wants to learn by doing, accepts making mistakes, and prefers to understand before buying.

Scope of the notes Measurements for the specific case Work in a home workshop No professional advice Documented mistakes Real supplies and costs
Notebook notes open for reference Write to the workshop

Before you start: questions that often come up

Every entry in the notebook follows the same approach: telling the process exactly as it happened, with its timelines, its materials, and its setbacks. These are the questions that come up most often when someone wants to follow a workshop note from start to finish.

Write a question

Do I need my own workshop to follow the notes?

No. Most of the work can be done on a sturdy table, a couple of sawhorses, or even the balcony floor with a piece of cardboard underneath. What is worth doing is setting aside a surface that does not move while you sand or screw, because half the result depends on that. If the space is small, the notes on organizing the workbench explain how to solve it on a narrow wall.

Which tools should I buy first?

Before adding machines, it is worth securing the basics: a square, a tape measure, a hand saw, screwdrivers, an adjustable wrench, and some kind of clamp. With that you can handle light carpentry, bike adjustments, and various household repairs. Power tools are justified when the work is repeated often; if it is a one-off job, it can often be done by hand without losing precision.

How long does each project take?

It depends on the work and interruptions. A brake or gear adjustment can be done in an afternoon; building a workbench or repairing a glued chair is usually spread over several days because there are drying times that cannot be rushed. Each entry clarifies which steps are continuous and which require pauses, so that night doesn't catch you halfway through.

Can the step-by-step be followed without prior experience?

Yes, as long as the warnings are respected. In electricity and soft soldering the margin for error is smaller, so the notes insist on cutting the breaker, checking with a voltage tester, ventilating the area, and using eye protection. In carpentry and bicycle maintenance, learning is more forgiving: if something comes out loose, you take it apart and do it again.

Are the materials mentioned mandatory?

No. The lists work as a reference for measurements and expected behavior, not as a closed recipe. If in your area the pine comes in a different dimension or the cable has another gauge available, it can be adapted as long as the function is respected: stability on the bench, adequate cross-section in the installation, correct tension in the brakes. Each note indicates what can be substituted and what is best left untouched.

What happens if the result does not come out like the note?

It is part of the craft. Several entries document precisely one's own mistakes: joints with pores, cuts out of square, glue-ups that gave way. The useful thing is to understand why it failed before repeating the step. If after reviewing the note a specific doubt remains, you can write by email and the answer is added to the notebook when it contributes something concrete.

For questions about the content, usage permissions, or corrections to an entry, write to info@mischiealexandru.com or review the conditions at /terms.

Write when something doesn't add up

If an entry in the notebook leaves you with a specific question, if a step doesn't match your materials, or if you found an error that should be corrected, the most direct route is email. Tell me what you were doing, with which tool, and at what point it got stuck. There are no support forms or promised response times: it's a personal notebook, and replies come when they come.

For matters about using the site, content permissions, or any formal inquiry, the contact page gathers the details and the available form. If you'd rather review beforehand how data is handled and the terms of use, they are published separately.

Cookie settings

We use cookies to keep the site stable, remember basic options, and understand which pages are useful. You can accept, reject, or review the settings before continuing.